Creating a project and launching an autotest
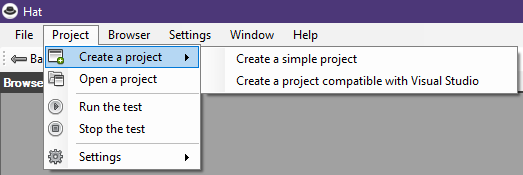
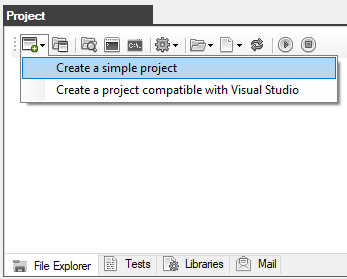
1. In the Project window, on the Explorer tab or in the main Create Project menu, click the Create Simple Project button
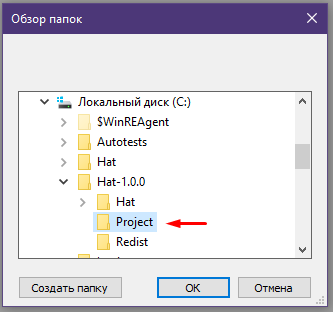
2. Create a folder that will contain the project with any name and anywhere on the disk.
In this case, the Project folder has been created at C:\Hat-1.0.0\
Select the project folder and click OK
3. In the Project window, the contents of the project will be displayed on the Explorer tab.
As you can see, the project is not empty, it contains several demo autotests.
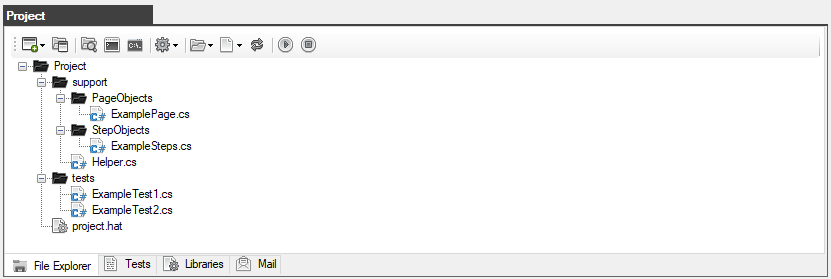
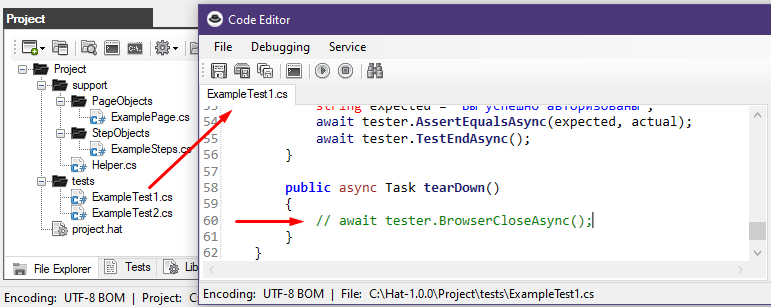
4. Double-click on the ExampleTest1.cs file to open it in the code editor.
In line 60, a line is commented out with a call to the BrowserCloseAsync() method that closes the browser.
This is necessary so that the browser does not automatically close after the completion of the autotest.
The project has been successfully created.
Created with the Personal Edition of HelpNDoc: Benefits of a Help Authoring Tool